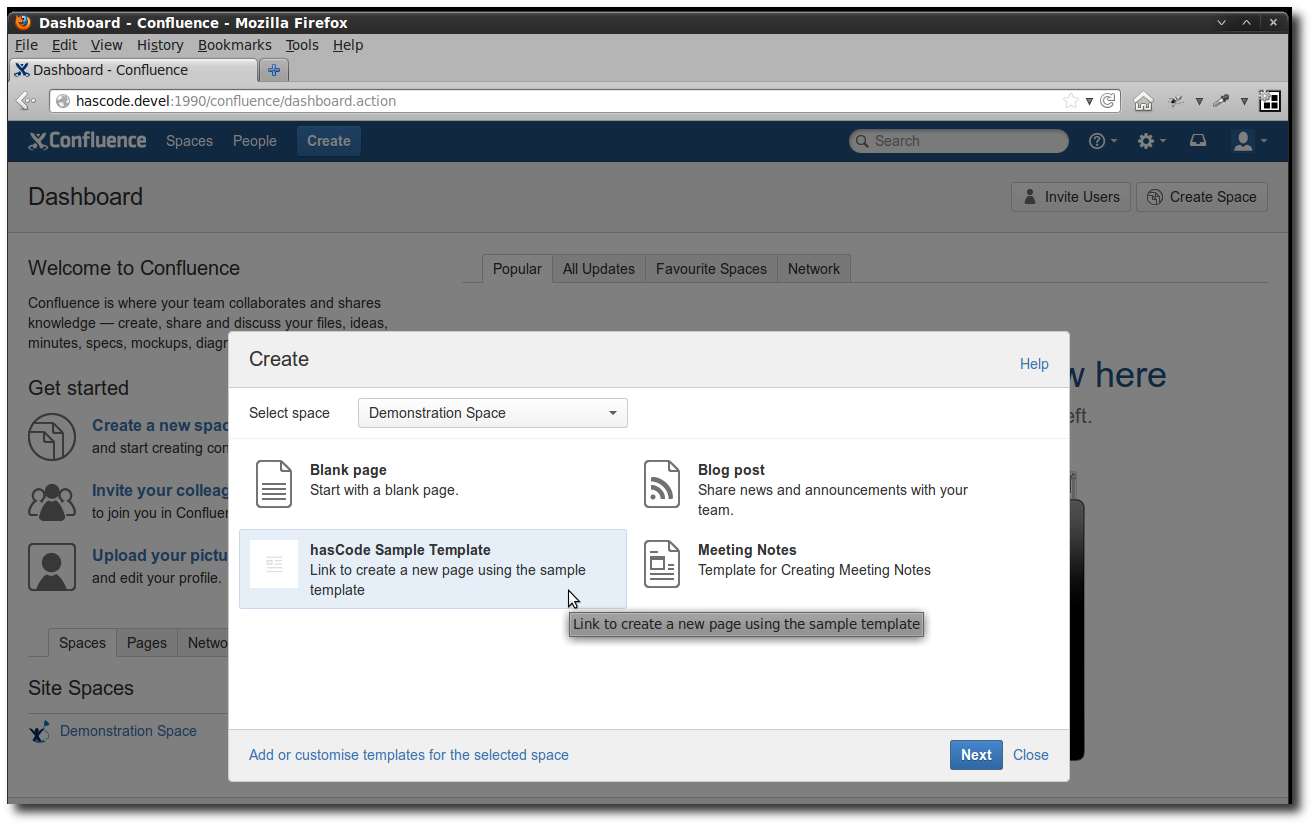
Blueprint is a new API in Confluence 5 that allows developers to create new content elements and to hook into the Confluence “create” dialogue – not to be confused with OSGi blueprints, the CSS blueprint framework or Tinkerpop Blueprints here.
Content may be added using simple XHTML templates, dynamic templates enriched with data from context providers or even customized JavaScript dialogues.
Another feature is, that pages of a specific blueprint type may be aggregated in a collector view that displays all pages created with the specific blueprint
In the following short example we’re going to create a simple blueprint adding some dynamic data to the blueprint template using a context provider.
Prerequisites
You should have general knowledge of plugin development for Confluence and you should have the Atlassian Plugin SDK installed.
I’d highly recommend to read the excellent tutorials in the Atlassian Developer Documentation first as they give much more detailed information as I’ll be giving in this tutorial here:
Project Setup
Create a new confluence plugin project first using the sdk and entering groupId, artifactId etc. according to your needs..
atlas-create-confluence-pluginAfterwards change into the directory created and modify your pom.xml:
-
Set the confluence-version in your project properties to 5.0.3 or another version that supports the content-creator API
-
Add an OSGi import package statement for atlassian’s createcontent:
<plugin>
	<groupId>com.atlassian.maven.plugins</groupId>
	<artifactId>maven-confluence-plugin</artifactId>
	<version>${amps.version}</version>
	<extensions>true</extensions>
	<configuration>
		<productVersion>${confluence.version}</productVersion>
		<productDataVersion>${confluence.data.version}</productDataVersion>
		<instructions>
			<Import-Package>
				com.atlassian.confluence.plugins.createcontent.extensions;version="0.0.0",
				*
			</Import-Package>
		</instructions>
	</configuration>
</plugin>
Finally create the project files needed for your IDE .. e.g. for Eclipse:
atlas-mvn eclipse:eclipseHaving done this you should now be able to import the project into your IDE.
Creating the Blueprint
There are only a few steps necessary to create a runnable content-creator/blueprint plugin .. the most simple blueprint only needs a template and a blueprint declaration and that’s all.
Creating the Template
We’re writing a simple xhtml template using the Confluence Storage Format. It defines a header-two-column-footer page layout, uses the pagetree and loremipsum macro to populate some content there.
Please note the declaration of a variable named creationDate using <at:var at:name=”creationDate”/> – this is the variable that is filled with dynamic data from the context provider.
<div class="contentLayout"
	data-atlassian-layout="{'name':'pagelayout-two-left','columns':['aside','large'],'header':true,'footer':true}">
	<div class="header">
		<div class="innerCell">
			<h1>Template Header</h1>
			<small>Document created: <at:var at:name="creationDate" /></small>
		</div>
	</div>
	<div class="columnLayout twoColumns">
		<div class="cell aside">
			<div class="innerCell">
				<h2>Subpages</h2>
				<p><ac:macro ac:name="pagetree" /></p>
			</div>
		</div>
		<div class="cell large">
			<div class="innerCell">
				<p><ac:macro ac:name="loremipsum" /></p>
			</div>
		</div>
	</div>
	<div class="footer">
		<div class="innerCell">
			<hr />
		</div>
	</div>
</div>
The template is registered in the atlassian-plugin.xml like this:
<content-template key="hascode-blueprint-template"
	template-title-key="hascode.sample-template.title">
	<resource name="template" type="download"
		location="com/hascode/plugin/confluence/template/xml/sample-template.xml" />
	<context-provider
		class="com.hascode.plugin.confluence.component.CustomContextProvider" />
</content-template>
As you can see, there is a context provider declared for the template .. we’ll be adding it in the next step.
Creating the Context Provider
The context provider does nothing special but adds the current date to the context parameters.
package com.hascode.plugin.confluence.component;

import java.util.Date;
import java.util.Map;

import com.atlassian.plugin.PluginParseException;
import com.atlassian.plugin.web.ContextProvider;

public class CustomContextProvider implements ContextProvider {

	@Override
	public void init(final Map<String, String> params)
			throws PluginParseException {
	}

	@Override
	public Map<String, Object> getContextMap(final Map<String, Object> context) {
		context.put("creationDate", new Date());
		return context;
	}

}
Hook into the Create Menu
Also we’re adding a web item to hook into the create menu by adding the following lines to the atlassian-plugin.xml:
<web-item key="create-by-sample-template" i18n-name-key="hascode.create-link.title"
	section="system.create.dialog/content">
	<description key="hascode.create-link.description" />
	<resource name="icon" type="download"
		location="/com/hascode/plugin/confluence/image/hascode-macro-logo.png" />
	<param name="blueprintKey" value="hascode-blueprint" />
</web-item>
The blueprintKey parameter references the following blueprint declaration.
Final Wiring
Now to the final wiring .. add the following lines to the atlassian-plugin.xml. The index-key property is the name for the label that is automatically added to each page that you’ll be creating using this blueprint.
<blueprint key="hascode-blueprint" content-template-key="hascode-blueprint-template"
	index-key="hascode-index" />
Running the Results
Now you should be ready to deploy the final plugin to a confluence instance and test the results.
You can start a Confluence server using the following command from the SDK:
atlas-runAfterwards, please open http://localhost:1990/confluence in your browser and log in with username: admin and password: admin.
Now you’re ready to deploy the plug-in either by uploading it in the administration area or running atlas-install-plugin in the project directory.
When you login now and click the create button in the top menu you should be able to see your plug-in.

When you create the page now you should see the following preview and at last the created page with the dynamic generated time stamp added where we put the variable in the template.


If you create some more pages with this blueprint and click in the breadcrumb at “hasCode Sample Template” you’ll see a collector page that lists available items with this specific content type.
The index/collector page may be modified if you wish to customize it to your needs – it is documented in the Atlassian developer docs.
Please note that the collector uses the Lucene search index to aggregate its items so it might take some time until the index is refreshed – otherwise if you want to see the results immediately, just step to the administration area and recreate the search index there.

Tutorial Sources
Please feel free to download the tutorial sources from my GitHub repository, fork it there or clone it using Git:
git clone https://github.com/hascode/confluence-blueprint-sample.gitResources
Article Updates
-
2014-07-21: Fixed a typo in the template as described in the remark of @svenhess
