When it comes to the field of hybrid mobile application development, Ionic and its tool-stack is often an attractive choice.
Now there is Ionic Creator to speed up the development process offering an in-browser editor to create user interfaces via drag and drop and supporting basic templates for mobile applications like tabbed layouts etc.
In addition, a project created with this tool may be downloaded and started with easy and that’s what I’d like to show in the following short example.

Ionic Tools and Account Registration
First of all, we need to have the Ionic command line tool installed, how to install everything we need is documented in my blog article "Creating a hybrid mobile Application with Ionic, Cordova and AngularJS".
Second we need an online account, it’s free and we may register it at https://creator.ionic.io.
Creating a new App
Now we’re ready to create a new demonstration project, so we’re loggin in the Ionic Creator in our browser.
Load Ionic Creator
In the project overview we may create a new project.

Creating a new Project
When creating a new project we may select of a few templates e.g. to create a multi-tab layout there is a specific template. We’re using the blank template here, puristic..

Creating the User Interface
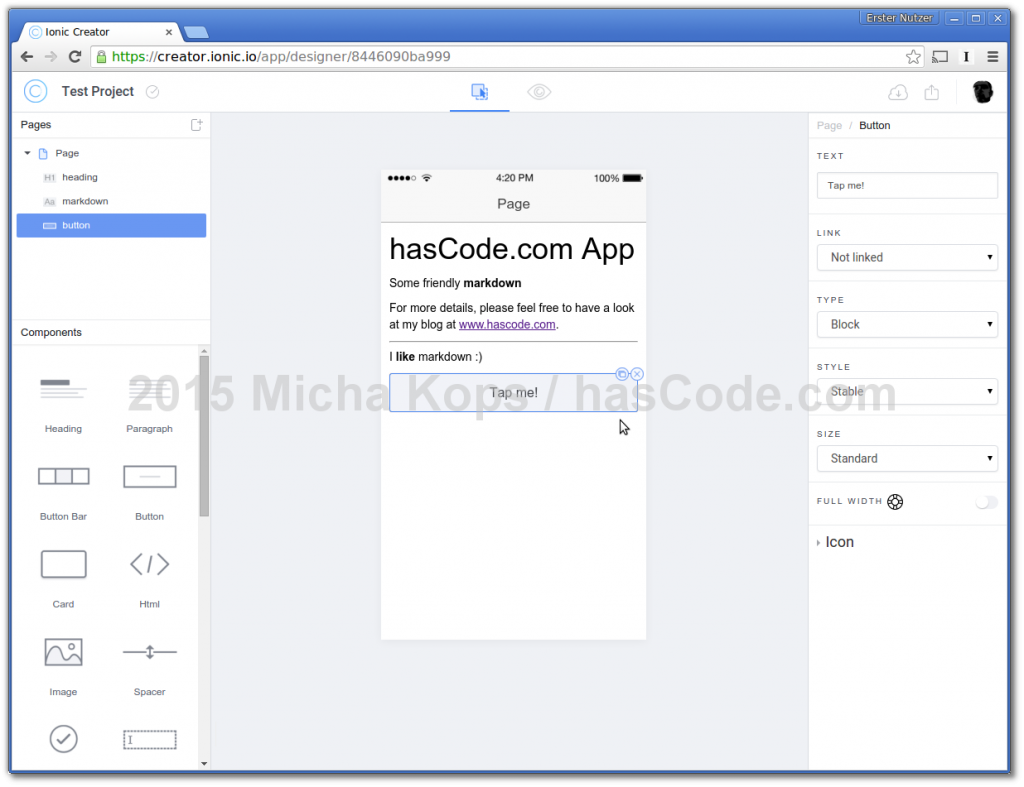
Now we may drag and drop GUI elements into our view and modify its contents.
I also like the paragraph element that allows to add contents quick using the markdown syntax.

When done editing we may save our current state using the save icon to the upper left of the screen.
Preview Function
Also the Creator offers a nice preview function to get a first impression of the look of our composed user interface.

Exporting the Project
In a real project, this would be a good time to add some logic to our application, therefore the creator offers different ways to export the project.
Since we have the command-line tools installed, we prefer the IONIC CLI option here since we simply need to copy and paste the ionic start command with the corresponding reference to our project id.

Running Local
Now we’re ready for some development ..
Clone Project
We’re checking out our project using the command-line interface and ionic start like this:
$ ionic start testapp creator:8446090ba999
Creating Ionic app in folder /tmp/testapp based on creator:8446090ba999 project
Downloading: https://github.com/driftyco/ionic-app-base/archive/master.zip
[=============================]  100%  0.0s

Downloading Creator Project: https://creator.ionic.io/api/v1/creator/8446090ba999/download-start/cordova?sid=xxxxxxxxxxxxxxxxxxxxxxxxxxxxxxxxx
Updated the hooks directory to have execute permissions
Update Config.xml
Initializing cordova project

Your Ionic project is ready to go! Some quick tips:
[..]
Now we have our full project ready to run..
Running the App
Now we may open the project in our editor of choice (webstorm ;) and start with the development .. to test if the downloaded project works out of the box, we’re simply running ionic serve and run the app in our local browser e.g.:
$ cd testapp && ionic serve
Running live reload server: http://localhost:35729
Watching: 0=www/**/*, 1=!www/lib/**/*
Running dev server:  http://localhost:8100
Ionic server commands, enter:
  restart or r to restart the client app from the root
  goto or g and a url to have the app navigate to the given url
  consolelogs or c to enable/disable console log output
  serverlogs or s to enable/disable server log output
  quit or q to shutdown the server and exit
So this is what our local running application looks like in our browser.

Resources
Further Articles
Please feel free to have a look at other Ionic tutorials of mine here:
