Prerequisites
We assume, that the Synology NAS basic configuration has been applied and that a shared directory is ready to be our sync target.
We will be synchronizing the directory /tmp/samples to the NAS directory
/volumes/samples.
Synology NAS Setup
First of all we need to enable some services on our NAS.
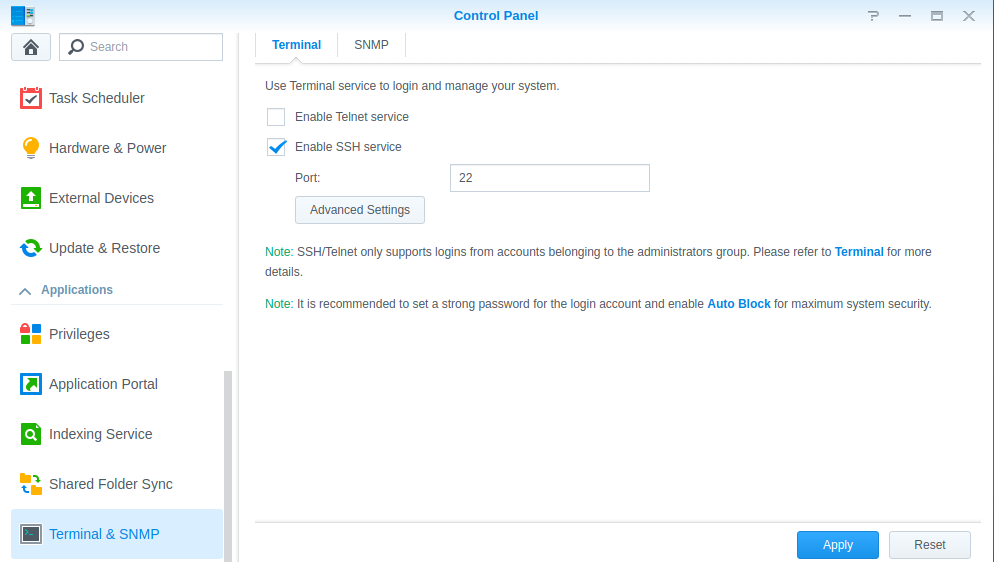
Enable SSH and Rsync on the NAS
SSH is enabled at Control Panel → Terminal & SNMP → Terminal:

Rsync is enabled at Control Panel → File Services → rsync:

user must have admin permission
Activate User Homes on the NAS
Because we want to store our SSH pub key in our NAS user’s home directory, we need to enable user-homes.
The option is found here Control Panel → User → Advanced → User Home:

Setup SSH Keys and Configuration
We’re setting up a new SSH key and adding an entry for the NAS in our SSH configuration for easier connections.
Create a new SSH Key, add SSH Config
We’re adding a new SSH key, storing the public and the secret key in our
.ssh directory.
ssh-keygen -t rsa -b 2048 -f ~/.ssh/rsync-nasWe’re adding the following section to our ~/.ssh/config:
Host nas
HostName 192.168.xxx.xxx (1)
Port 22
User mybackupuser (2)
IdentityFile ~/.ssh/rsync-nas| 1 | Replace with your NAS station’s IP address |
| 2 | Replace with your user on the NAS station |
Upload SSH Key to Synology NAS
We’re using ssh-copy-id to upload our keys to the NAS.
Just to be safe we’re forcing ssh to use password-authentication as only method (-o PreferredAuthentications=password -o PubkeyAuthentication=no).
ssh-copy-id -o PreferredAuthentications=password -o PubkeyAuthentication=no -i ~/.ssh/rsync-nas mybackupuser@192.168.xxx.xxx
/usr/bin/ssh-copy-id: INFO: Source of key(s) to be installed: "/xxx/xxx/.ssh/rsync-nas.pub"
/usr/bin/ssh-copy-id: INFO: attempting to log in with the new key(s), to filter out any that are already installed
/usr/bin/ssh-copy-id: INFO: 1 key(s) remain to be installed -- if you are prompted now it is to install the new keys
mybackupuser@192.168.xxx.xxx's password:

Number of key(s) added: 1

Now try logging into the machine, with:   "ssh -o 'PreferredAuthentications=password' -o 'PubkeyAuthentication=no' 'mybackupuser@192.168.xxx.xxx'"
and check to make sure that only the key(s) you wanted were added
By now we should be able to connect to our NAS using the following command:
ssh nasSynchronizing Files with rsync
Now we’re ready to synchronize files with rsync:
rsync -avuz -e '/usr/bin/ssh -i /home/localuser/.ssh/rsync-nas' /tmp/samples/* mybackupuser@192.168.xxx.xxx:/volume1/samples